Creating a Dedicated EAC User
When you install your web server (Apache or Nginx), the default service user is usually www-data.
For better security and maintainability, it is recommended to create a dedicated user named eac, with www-data as its default group.
This user will be responsible for deploying, executing, and managing the EAC application.
Default application login (EAC UI)
When EAC is installed, a default application user exists:
login: eac@cidwe.com
password: eac
Important: This account is for initial access only. Change the password immediately or disable/remove the user after creating your own admin account.
Suggested actions
- Change password from the UI right after first login
- Create a new admin user, verify access, then disable or delete
eac@cidwe.com.
It is strongly recommended to remove or disable this user or at least to change its password for security reason.
1. Create the eac user
sudo useradd -m -g www-data -s /bin/bash eac2. Set a password for the eac user
sudo passwd eac3. Verify the user creation
id eacCreating users from the UI
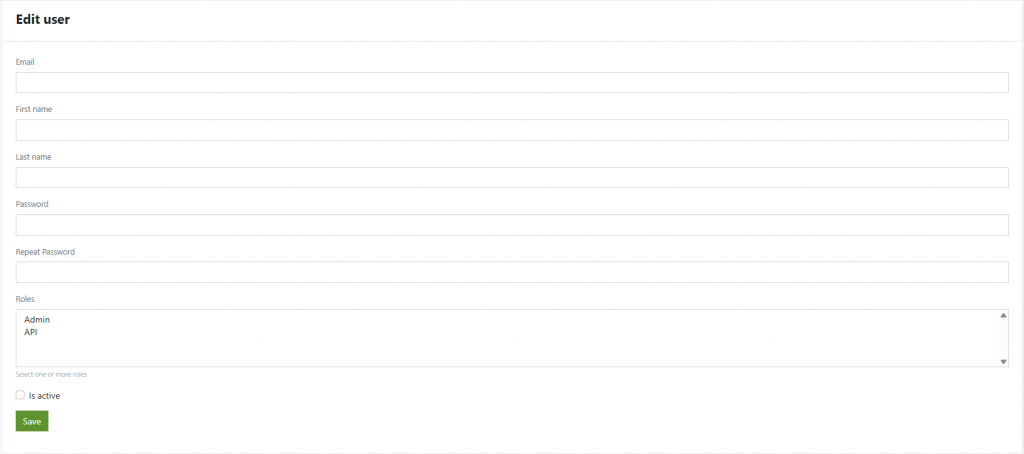
- Go to Users.
- Click Add.

- Fill the form:
- Email (required)
- First name, Last name (optional but recommended)
- Password and Repeat Password
- Roles (multi-select ctrl+click to select more than one):
- Admin – full access to the UI and settings
- API – programmatic/API access (use for integrations)
- Is active – must be checked for the account to be usable
- Click Save.
Configure Default Permissions
To ensure proper file and folder ownership (replace /var/www/html with your actual installation path):
sudo chown -R eac:www-data /var/www/html
sudo find /var/www/html -type d -exec chmod g+rwx,g+s {} \; -o -type f -exec chmod g+rw {} \;
sudo find /var/www/html -type d -exec chmod 2775 {} \;
sudo find /var/www/html -type f -name "*.sh" -exec chmod 774 {} \;
Notes
You can re-run the above four commands at any time if you accidentally change permissions or encounter issues.


