Overview
The Workflow feature allows you to automatically trigger one or more tasks after the execution of another task, based on the result status of that execution.
It enables conditional automation between tasks in the same project.
How It Works
After a task execution, you can define rules that specify:
- Status condition – The execution result that will trigger the rule.
Possible statuses are:SuccessWarningErrorTerminated
- Target task – The task(s) to launch automatically when the selected status condition is met.
Each rule defines a link between a source task and one or more target tasks, allowing complex workflows to be created across the project.
Rule Creation
- Select a status condition (e.g., Success).
- Choose one or several target tasks to execute when that status occurs.
- You can select any task in the project, except the current one.
- Optionally enable or disable the rule using the “Is active” switch.
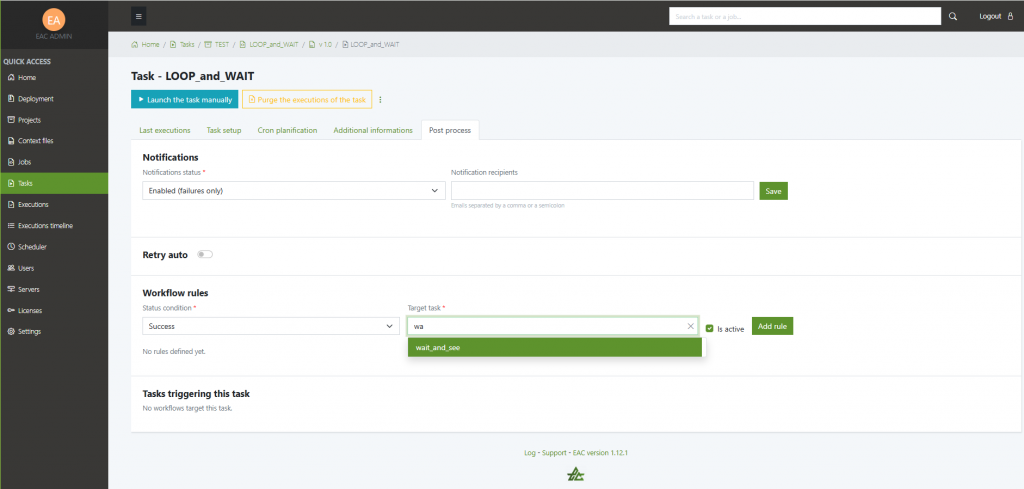
- Click Add rule to save it.
⚠️ You cannot create multiple rules with the same combination of status condition and target task for the same task.
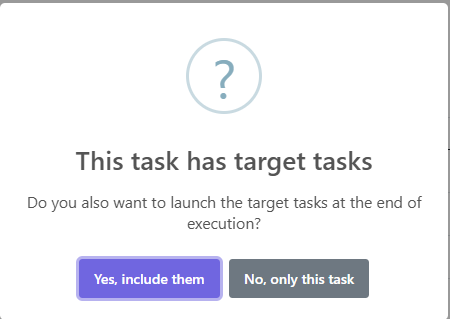
If you launch a task with a workflow you’ll be prompted to launch it with the workflow or without it
Multiple Tasks per Status
You can assign several target tasks for the same status, as long as they are different tasks.
Each active rule will trigger independently when the matching status is reached.

Disabled Target Tasks
If a target task is disabled, the workflow will not execute it.
However, it will still appear in the workflow summary table and will be marked as disabled for visibility.

Linked Tasks Overview
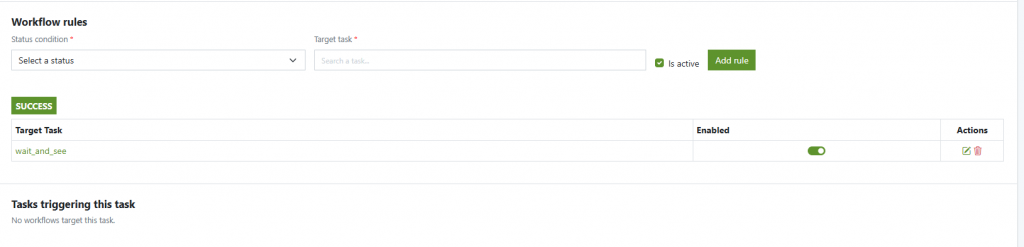
At the bottom of the workflow configuration page, two tables are displayed:
- Workflow rules – Lists all rules defined for the current task, grouped by status (e.g., SUCCESS, WARNING, etc.).
- Tasks triggering this task – Shows all other tasks that have configured this one as a target.
Each entry includes a direct link to the originating task.

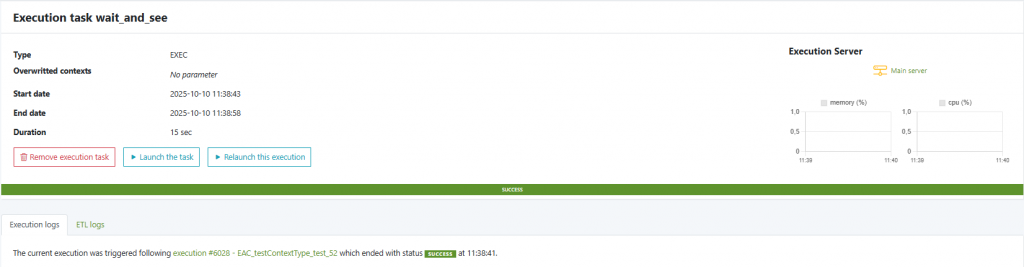
Execution Logs and Workflow Tracking
When a task is executed as part of a workflow, the execution logs provide additional details to help you understand what triggered the task and what tasks will be triggered afterwards. This makes it easy to follow the entire chain of executions in a workflow.
Example setup
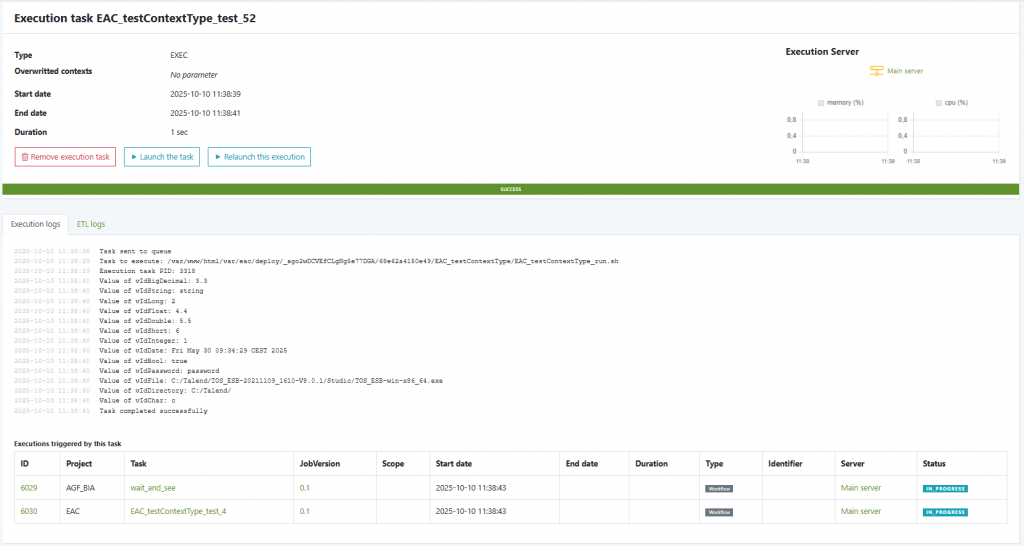
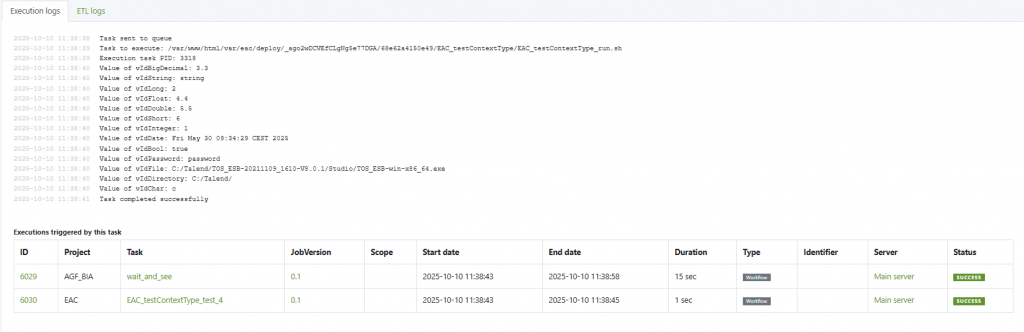
n the following example, when a task completes with a Success status, two target tasks are defined:
- wait_and_see
- EAC_testContextType_test_4

Trigger Information
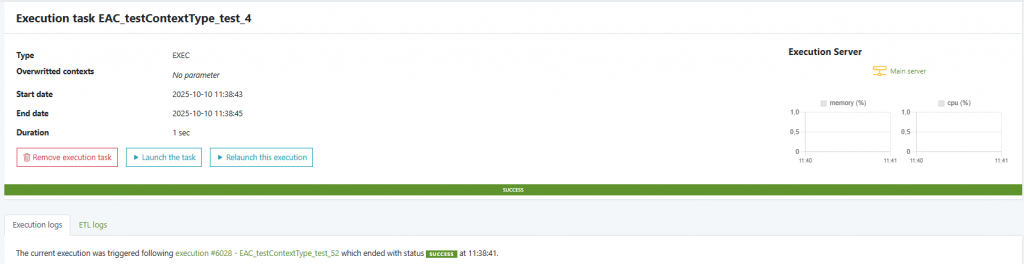
At the top of the execution log of a workflow-triggered task, you will see which task caused this execution, under which status, and at what time.
For example:
The current execution was triggered following execution #6028 –
EAC_testContextType_test_52, which ended with status SUCCESS at 11:38:41.
Triggered Tasks Table
At the bottom of the execution view of the initial task (the one that finished with the triggering status), a summary table lists all the tasks that have been launched as a result of its execution.
This table includes:
- Task ID and name
- Project
- Job version
- Start and end date
- Duration
- Type and server
- Current execution status
Once all target tasks are finished, you can return to the execution view of the original triggering task to see the completed summary of all triggered tasks.
Example
If task A completes with a Success status, and a workflow rule links it to task B,
then task B will be automatically triggered as soon as A finishes successfully.
If both B and C are defined for Success, both will be triggered in sequence.
Next see Retry auto.


