This quick guide will help you deploy and run your first ETL job in EAC.
It is designed as a guided walkthrough: you will upload a Talend-generated job, configure a task, and execute it.
At the end, you’ll know the basics and where to go for advanced topics.
1. Upload & Deploy the Job
Before deployment, you need a job archive generated from Talend DI / ESB / Talaxie exported as a .zip file.
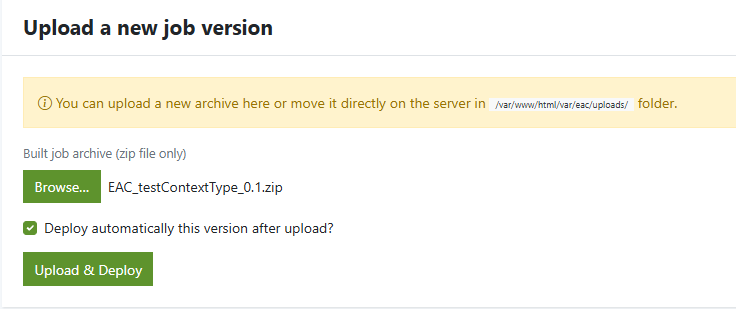
- Log into EAC with an account that has deployment rights.
- Navigate to Deployment > Upload a new Job version.
- Select your
.zipfile. - Check “Deploy automatically this version after upload” if you want it to be deployed immediately.
- Click Upload & Deploy.
After deployment, you are redirected to the Job details page, where you can view:
- the job name
- available job versions and date
- the context applied by default
- deploy errors
- deployment folder
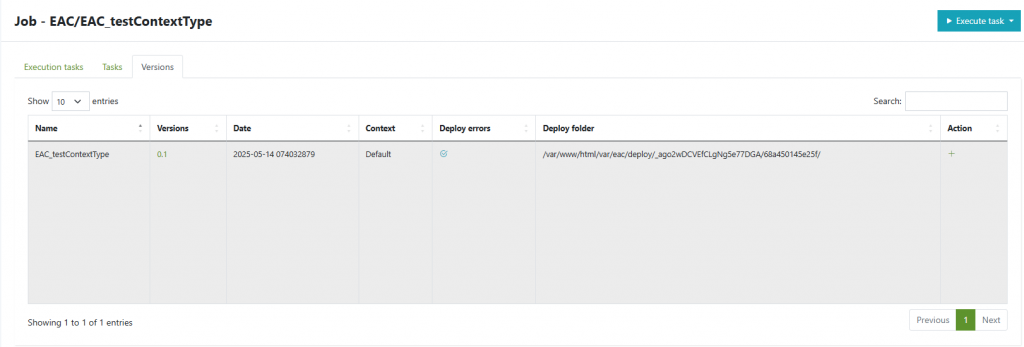
More details about versions → see Job Versions.
3. Create a Task for the Job
Jobs must be linked to Tasks to be executed.
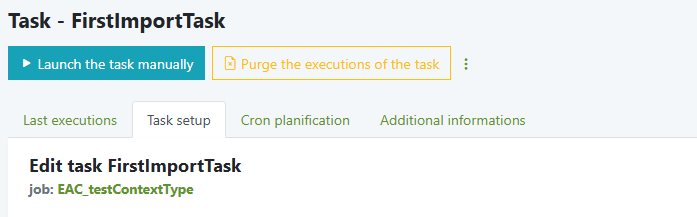
At this point you must create a new task.
- From the job page, stay on the Versions tab.
- Click the “+” button to create a new task.

- Fill in task properties:
- Name (ex:
FirstImportTask) - Job version (or select Follow last job version)
- Optional: scope, parallel launch, Log warning for parallel launch attempt, acknowledgement see (good use of ack)
- Name (ex:
- Configure notifications (email recipients, failure only or all runs).
- Save the task.

🔗 For all available task configuration options → see Tasks.
4. Execute the Task
You can run your task manually or schedule it.
Manual execution
- Once the task has been saved, the interface will refresh and display additional tabs and options.
- Click on “Launch Task Manually”.
- You will be redirected to the Execution Logs page, where you can monitor the execution task in real time.

- The execution status will update dynamically (In progress→ Success / Error).
- Detailed logs are available directly from this page for troubleshooting.
Scheduled execution
- Go to the task setup → Cron planification tab.
- Add a scheduler and define the frequency.

- Don’t forget to enable scheduling.
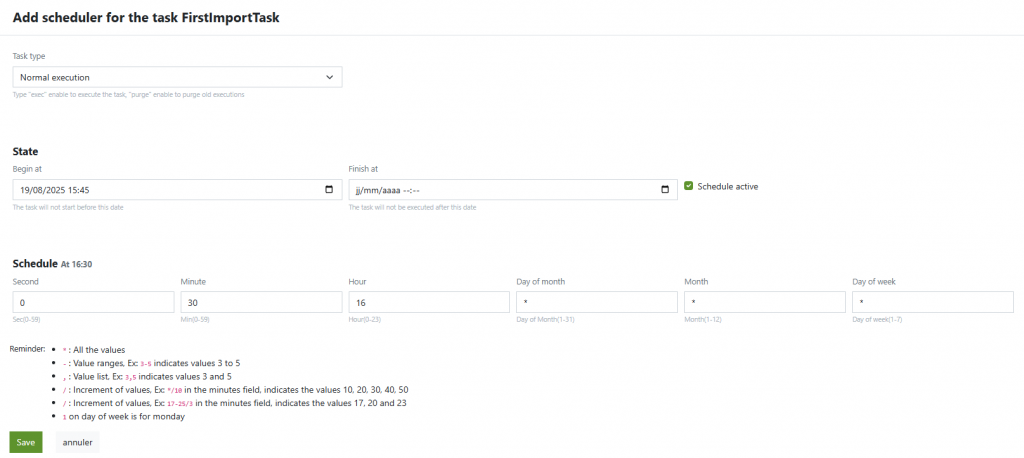
🔗 For advanced scheduling options → see Schedule a task.
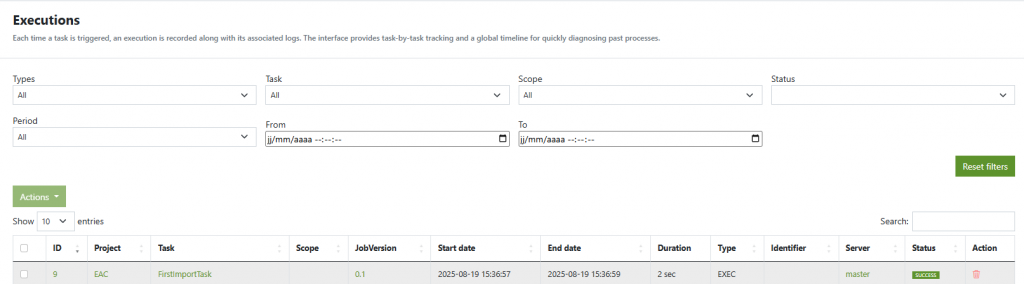
5. Monitor Execution
After a task is launched, EAC creates an Execution Task instance.
From the Executions page, go to to your task:
- Check status: Success, Error, killed, ...
- View logs and runtime metrics by click on the ID.
🔗 For advanced troubleshooting → see Monitoring.
6. What’s Next?
Congratulations — you have successfully deployed and executed your first ETL job!
Here are the next steps you might explore:
Organize jobs by project/context → see Good use of contexts.
Distribute executions across servers → see Multi-Server Execution.
Enable automatic log purging → see Good use of purges.


